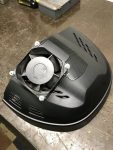
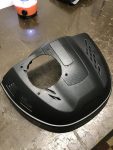
Our good buddy and SRM founding member Mark (mphile77) recently took it upon himself to do some preventative maintenance on his T300RS. He was kind enough to document his process and share it with all of us!
-Background-
I’ve owned a few wheels in my in my time of sim racing. I started racing in GT5 but didn’t get a wheel until GT6 came along. I used the cheap go to wheel the DFGT. Legendary in its own right because you could not kill them! Wanting more bang for my buck I ordered a Thrustmaster T300, wow what a difference! I was in love with my new T300 until about 6 months in she died on me. I was issued a second wheel from Thrustmaster and that one died as well a month later. So in the mean time I ordered the G29 from Logitech and was brought back to the world of reliability but a lack of FFB. At this point I was waiting for my 3rd T300 to arrive at my door, and I wasn’t completely satisfied with the FFB of G29 so I went to ebay and found a used T500. Wow, I was in love all over again, minus the static shift paddles. I learned to overcome the paddles, and just loved this wheel to death! Fast forward close to 2 years and my T500 has crapped out on me, so what to do? I’ve since sold the G29, and I only have the 3rd T300 wheel I was issued from Thrustmaster sitting on the shelf. So, based on my previous wheel history I am afraid this wheel wont last like the others. So this whole story leads to this, the T300 external cooling fan to help the life of my wheel.
-Setup-
T300RS wheel and T500 pedals with basher brake pedal mod.
Currently racing Project Cars on PS4
-Project-
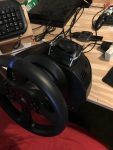
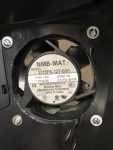
Install External 115volt cooling fan.
Time to complete was 1hr 15min.
Cost $20-$25 for Fan and supplies
-Tools needed-
Drill and bits, jig saw, phillips screwdriver, flat head screwdriver, marker, compressed air and vacuum, a radio and mixed drink  .
.
-The cooling mod details-
- Remove wheel rim
- Remove 4 faceplate screws
- Remove the 3 screws behind the face plate (It’s the 3 screws holding the top lid section only!)
- Flip housing over and remove the 5 outer edge screw.
- Above the L3 & R3 and mode buttons you will gently push in, this will release 2 tabs and the lid pops straight off.
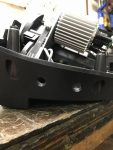
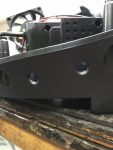
- Now find power supply behind mode button area and drill 2 3/8″ holes on side of the housing, and one in the floor of the housing.
- Drill 2 more holes on opposite side of housing (these will be fresh air intake holes)
- Mock up the fan on the lid best you can over the motor area
- I used 6/32 machined screws with flat washers and a lock washer with a nut to secure fan. (You can also run a bead of black silicone around base of fan if you desire.)
- Reassemble in the reverse order, and you should be ready to mount your wheel assembly back in your rig
- Plug in and off you go!

